Author: Philippe Arteau
When we were looking at the interactions between the Outlook and the LinkedIn APIs, we encountered WebSocket communications that used some additional encoding. The encoding was nothing too complex, but it was uncommon. It turned out to be LZip compression. However, the inability to read the content of the requests with Burp, ZAP or Web developer consoles in real-time made it difficult to analyze the API.

While our proxy of choice is usually Burp Suite, it did not allow us to extend WebSocket views. We turn ourselves to the open-source project Zed Attack Proxy. It reveals to be easily extendable for custom WebSocket tooling. In this blog post, we will explain how you can implement your own custom view to display complex WebSocket messages.

When we were looking at the interactions between the Outlook and the LinkedIn APIs, we encountered WebSocket communications that used some additional encoding. The encoding was nothing too complex, but it was uncommon. It turned out to be LZip compression. However, the inability to read the content of the requests with Burp, ZAP or Web developer consoles in real-time made it difficult to analyze the API.
While our proxy of choice is usually Burp Suite, it did not allow us to extend WebSocket views. We turn ourselves to the open-source project Zed Attack Proxy. It reveals to be easily extendable for custom WebSocket tooling. In this blog post, we will explain how you can implement your own custom view to display complex WebSocket messages.
Building your custom ZAP WebSocket plugin
You will need three classes to link your decoding algorithm to ZAP. Those classes will implement the following Interfaces:
- Extension: This class will be the main class that is registered to ZAP to handle load (hook in ZAP’s terminology) and unload events when your plugin is activated or deactivated.
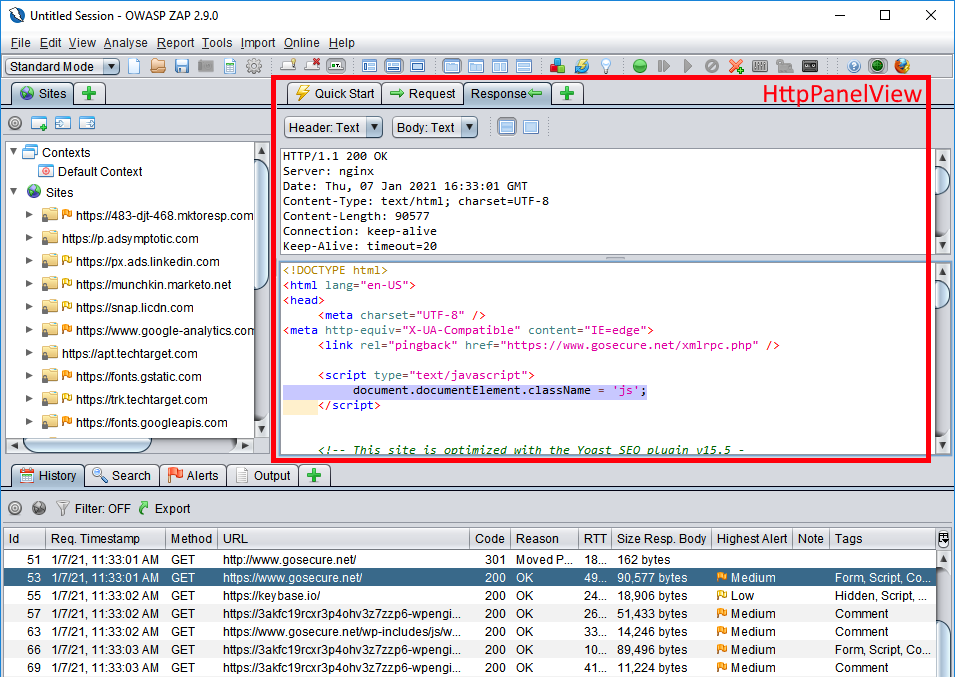
- HttpPanelView: This is where you will place your decoding algorithms and the UI components required to display the final value. You can always decouple the decoding code in separate classes to follow good design practices.
- HttpPanelViewFactory: This class handles the creation of new
HttpPanelView. Little to no code will be needed.
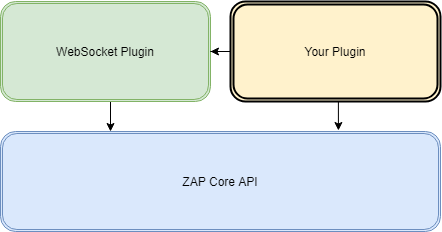
At high-level, we are not only interacting with ZAP core. The WebSocket component is not part of ZAP core. This means two things. First, you will be depending on interface and class from the WebSocket plugin. You also need to declare in your plugin configuration that you are depending on an external plugin.
Registering your view
HttpPanelView is the interface that defines a view for HTTP messages and it is reused for the WebSocket traffic. In your extension initialization phase, you need to register your view. The only difference with HTTP messages will be the target component. In this case we must use “WebSocketComponent” (WebSocketComponent.NAME). Also note that the view is not registered directly. The Abstract Factory design pattern is used as follows: val viewFactory = AutoDecodeViewFactory()
panelManager.addRequestViewFactory(WebSocketComponent.NAME, viewFactory)
panelManager.addResponseViewFactory(WebSocketComponent.NAME, viewFactory)
Implementing your view
The view will include the UI components required to display the final value. You can use basic Swing components or RSyntaxTextArea if you need some code highlight.
Here are the key functions to implement in an implementation of HttpPanelView:
- The function getCaptionName() will define the caption for the view selection.
override fun getCaptionName(): String {
        return "Auto-Decode"
}getPane()is retuning a reference to the swing root component. It is recommended to build your layout once and always return the same reference for better performance.
override fun getPane(): JComponent {
        return mySwingComponent
}dataChanged()is the function called when a new message is selected and your view is active. When handling this event, you will need to update your component to display.
override fun dataChanged(event: HttpPanelViewModelEvent) {
    ...
}
The final product
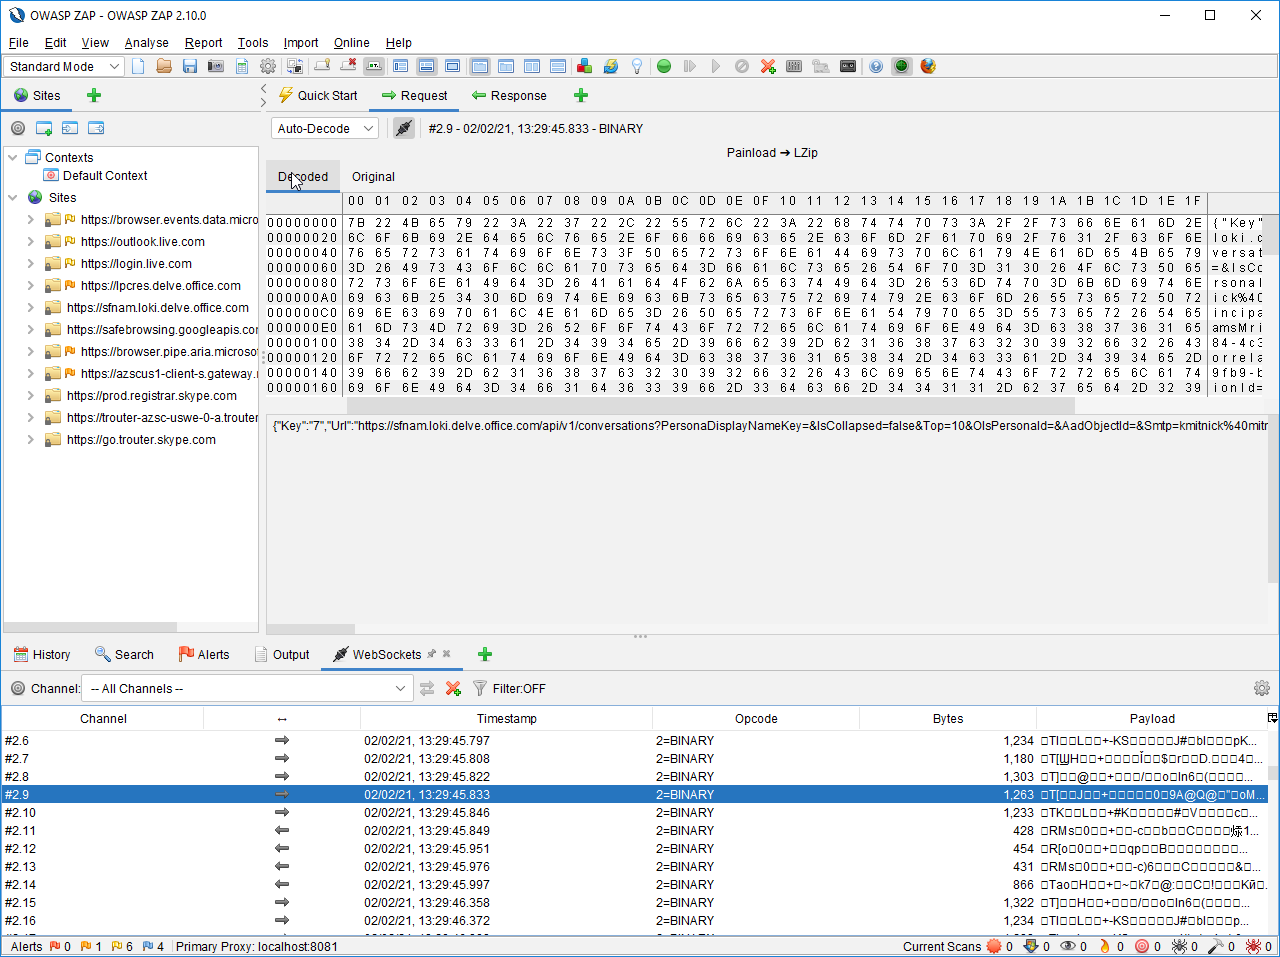
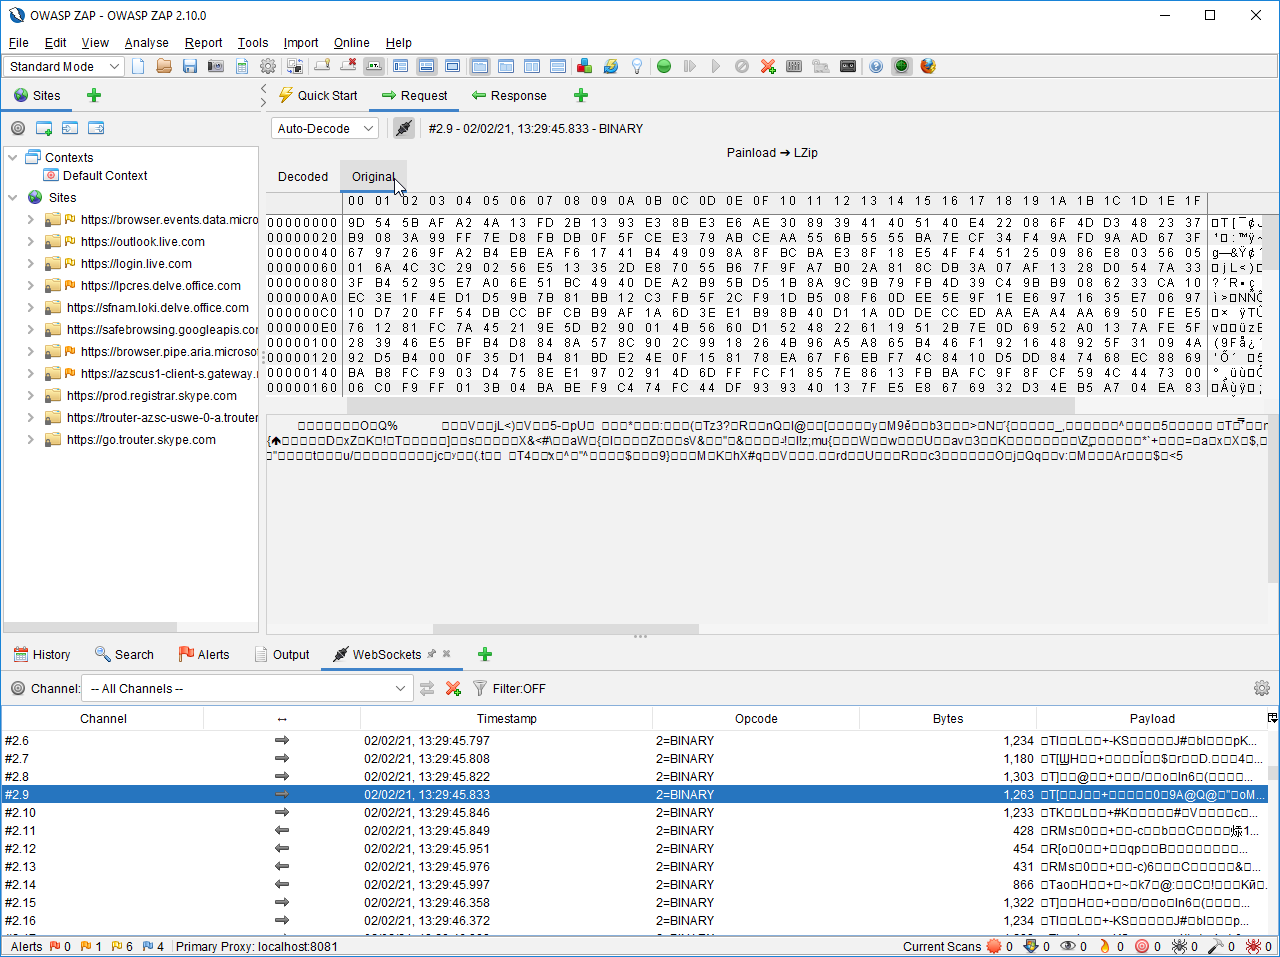
Here is the plugin that was built to handle multiple generic encoding or compression algorithms. For each incoming or outgoing message, we are testing a variety of common encoding and compression algorithms. In order, we are testing the following algorithms. If one succeeds, we are displaying its result.
- ZIP
- LZIP
- Base64
- URL decoding
- Brotli
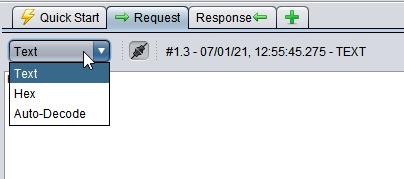
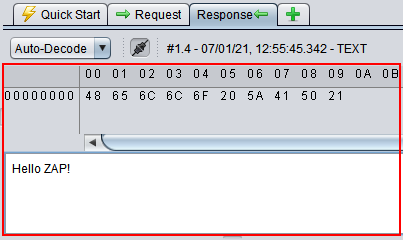
We are displaying the same message in hexadecimal and in text format to support both text message and binary format.
Here are two screenshots showing the final product in action.
You can view the code on GoSecure’s GitHub repository at https://github.com/GoSecure/zap-autodecode-view.
